
Imagine you are packing up the car for a fun family day at Landa Park, or you are heading out early to beat the heat for a floating trip down the Comal River. You press your garage door remote button, backing out into the driveway. You press the button again to close it, expecting to hear that familiar, comforting thud of the door sealing shut.
Instead, the door travels down a foot or two, stops, and violently reverses back up to the ceiling. Or worse, it does not budge at all, leaving your home, your tools, and your family's belongings completely exposed to the world.
A garage door that refuses to close is more than just a minor annoyance. It is a major security hazard and a safety risk for your household. In Comal County, where summer temperatures regularly soar past the triple digits, an open garage door also means throwing money out the window as your air conditioner fights a losing battle against the South Texas heat.
When your overhead door system fails, you need answers fast. This comprehensive guide will walk you through exactly why your garage door won't close, how to safely troubleshoot the issue yourself, when it is time to call in the professionals for expert garage door repair, and how to maintain your system so you never get stuck again.
1. Safety First: The Golden Rules of Garage Door Troubleshooting
Before you touch a single part, screw, or cable on your overhead door, we need to talk about safety. Your garage door is very likely the largest, heaviest moving object in your entire home. It weighs anywhere from 150 to over 400 pounds. It is held under an immense amount of mechanical tension by heavy-duty steel springs.
When something goes wrong with the system, that tension can become unpredictable. Every year, thousands of homeowners across the United States suffer severe pinch injuries, lacerations, and broken bones from DIY garage door mishaps.
To keep yourself and your family safe during troubleshooting, always adhere to these four golden rules:
- Never Touch the Torsion Springs or Bottom Brackets: Torsion springs (mounted on a metal rod above the door) and extension springs (stretching along the upper tracks) store enough mechanical energy to cause fatal injuries if they snap or unwind suddenly. The bottom brackets connecting the cables to the door are under the same extreme tension. Leave these parts exclusively to trained technicians.
- Disconnect the Power: Before inspecting mechanical parts or wiping down tracks, unplug the garage door opener unit from the ceiling outlet. This prevents anyone inside the house from accidentally pressing a wall button and activating the door while their hands are near the moving parts.
- Clear the Area: Keep children and pets far away from the garage while you are actively investigating the problem. A failing door can drop suddenly without warning.
- Use Proper Tools and Clothing: Wear sturdy work gloves and protective safety glasses. Never try to force a stuck door open or closed using raw physical strength, as this can bend the tracks and cause the door to fall completely out of its assembly.
2. The Most Common Reason: Misaligned or Blocked Photo-Eye Sensors
If your garage door starts to go down but instantly reverses while the overhead opener light bulbs flash repeatedly, you can almost guarantee the culprit is the electronic safety sensor system.
What Are Photo-Eye Sensors?
Since 1993, federal law has required all residential garage door openers to feature an electronic reversal system. This is achieved using two small infrared sensors located about six inches above the garage floor on either side of the door tracks. One sensor (the sending eye) emits an invisible infrared light beam across the opening, and the other (the receiving eye) captures that beam. If the beam is broken while the door is closing, the system assumes an object, a child, or a pet is underneath, and it immediately reverses direction.
Step-by-Step Sensor Troubleshooting
Because these sensors sit so close to the ground, they are highly susceptible to everyday disruptions. Follow these steps to resolve sensor-related issues:
- Check for Physical Obstructions: Look closely at the floor area between the two sensors. Even a stray weed blown in by the Texas wind, a misplaced garden rake, an outdoor toy, or a trash can edge sticking out can break the invisible beam.
- Inspect the Indicator Lights: Look closely at the small LED lights built into the side of each sensor. Usually, one is solid green,their and the other is solid amber or red. If one of these lights is completely dark or blinking rapidly, it means the invisible light beam is not making it across the opening.
- Clean the Lenses: Because garages are dusty spaces, the small glass lenses on the photo-eyes can easily become coated in dirt, cobwebs, or residue from lawn care activities. Take a soft, microfiber cloth and gently wipe away any dust or debris from both lenses. Do not use harsh chemical cleaners; a tiny drop of water or clean glass cleaner on a cloth is all you need.
- Perform Realignment: If the lights are still blinking after cleaning, the brackets holding the sensors may have been bumped by a trash can or a foot. Loosen the wing nut holding the misaligned sensor in place, gently wiggle the sensor until the LED light turns completely solid without blinking, and then hand-tighten the nut back down.
3. Mechanical Obstructions and Track Problems
If your safety sensors show solid lights but the door still stops midway down and clicks, the issue is likely a physical, mechanical restriction within the track assembly.
+-------------------------------------------------------------+
| COMMON TRACK AND ROLLER ISSUES |
+-------------------------------------------------------------+
| 1. Bent or Warped Steel Tracks |
| 2. Accumulated Dirt, Grease, and Hardened Grime |
| 3. Loose Mounting Bolts on Wall Brackets |
| 4. Worn, Cracked, or Seized Roller Bearings |
+-------------------------------------------------------------+
Inspecting the Tracks for Damage
Over time, the vibrations generated by a heavy garage door opening and closing thousands of times can loosen the mounting bolts holding the metal tracks to your garage walls and ceiling. If a track shifts even a quarter of an inch out of alignment, the rollers can bind up, causing the opener to detect an overload of resistance and stop closing.
Carefully look up the entire length of the tracks on both sides of your door. Look for noticeable bends, dents, or gaps between the track and the rollers. If you notice a minor bend in the metal lip, do not strike it with a heavy metal hammer, as this can permanently ruin the track shape. Specialized tools are required to smoothly warp, structural tracks safely.
Cleaning the Track Channels
Many homeowners think that applying thick grease inside the garage door tracks helps the door slide more smoothly. This is a major misconception. Thick automotive grease or WD-40 inside the tracks actually works like a magnet for dirt, hair, and South Texas dust. Over time, this mixture hardens into a thick, gummy paste that clogs the rollers and stops the door from closing properly.
To clean your tracks, grab a damp rag and a household degreaser or mineral spirits. Wipe down the entire interior channel of the tracks to remove all built-up sludge. Keep the tracks completely clean and dry.
Evaluating the Rollers
The rollers are the small wheels that glide inside the tracks. If your home uses cheap nylon or basic steel rollers without ball bearings, they can crack, warp, or seize up entirely after a few years of heavy use. Inspect each wheel as the door moves manually. If a roller is sliding or dragging instead of smoothly spinning, it needs to be replaced by a professional technician specializing in residential overhead doors.
4. Understanding the Manual Release Cord
When your garage door won't close automatically and you need to secure your home immediately before heading out, understanding how to operate your door manually is an absolute necessity.
Engaging the Emergency Release
Hanging down from your garage door opener's central carriage rail is a bright red cord with a plastic handle. This is your emergency manual release. When you pull this cord straight down and slightly back toward the opener motor unit, it disconnects the door's trolley from the motorized drive chain, belt, or screw drive.
Once pulled, the opener motor is completely bypassed. You can now walk over to the door, place your hands in the designated lift handles (never put your fingers between the door panels!), and gently push or pull the door down by hand until it rests flat against the concrete floor.
How to Lock a Manual Door
Keep in mind that when your garage door is disconnected from the automatic opener, it is no longer locked by the motor mechanism. Anyone could walk up to your driveway and lift the door open from the outside.
If your door has an internal physical slide lock bar, slide it firmly into the track slot to secure your home. If your door does not have a manual slide lock, you can clamp a pair of locking pliers (Vice-Grips) tightly onto the track directly above one of the rollers to temporarily prevent the door from being lifted until a repair technician arrives.
Re-engaging the Opener
Once the underlying mechanical issue is resolved, you will want to reconnect your door to the automatic system. Pull the red emergency cord forward (toward the garage opening) to reset the spring-loaded lever on the trolley. Then, either lift the door manually until you hear a loud, metallic clickmore smoothly or simply press your garage door remote button. The motor will run, the traveler will glide down the rail, and it will automatically lock back into the trolley mechanism.
5. Opener Settings: Adjusting Travel Limits and Force Adjustments
Sometimes, the issue isn't broken hardware or blocked sensors; it is a communication problem inside the brain of your garage door opener motor.
The Role of Travel Limits
Your garage door opener relies on internal settings known as "travel limits." These digital or mechanical settings tell the motor exactly how far the chain or belt needs to travel before the door is considered fully open or fully closed.
As seasonal humidity levels shift or your house settles over time, the physical distance between the opener and the garage floor can subtly change. If the travel limit is set just slightly too long, the door will hit the concrete floor, assume it has smashed into an obstruction, and instantly reverse back up to the open position as a built-in safety defense.
How to Adjust Travel Limits
On older garage door openers, you will find two small plastic adjustment screws on the side or rear panel of the motor housing, labeled "Travel" or "Open/Close." Turning the "Close" screw clockwise or counterclockwise with a flathead screwdriver changes how far down the door travels.
On modern smart openers, this process is entirely digital. You hold down a specific program button on the casing until the indicator lights flash, use the up and down arrow buttons to manually guide the door to its perfect floor sealing position, and then press the program button again to save the new memory setting.
The Danger of Force Adjustments
Right next to the travel limits, you will find settings for "Force Adjustment." This controls how much raw electric power the motor is allowed to exert when pushing the door closed or pulling it open.
CRITICAL WARNING: Never crank up the force adjustment settings to their maximum levels just to force a stubborn, sticky garage door to close. If your door is sticking because of a broken spring or warped track, increasing the motor force can cause the opener to tear itself off the ceiling, snap cables, or catastrophically crush objects or people caught underneath. Keep force settings at the lowest possible level required for smooth operation.
6. Major Component Failures: When It's a Broken Spring or Cable
If you have checked the sensors, cleaned the tracks, and verified the travel limits, but your door still makes a loud straining noise and refuses to budge, you are likely dealing with a broken spring or a snapped lifting cable.
+-----------------------------------------------------------------------+
| SIGNS OF A BROKEN SPRING OR CABLE |
+-----------------------------------------------------------------------+
| * A loud, gunshot-like bang coming from the garage earlier in the day |
| * A visible 2-3 inch gap anywhere along the coils of the top spring |
| * Lift cables hanging loosely, unspooled from the round metal drums |
| * The door appears visibly crooked or tilted as it tries to move |
+-----------------------------------------------------------------------+
The Heavy Lifting System
Your garage door opener is only a guide; it does not do the literal heavy lifting. That monumental task is performed by the springs. Torsion springs counter-balance the immense weight of the door panels, making a 300-pound door feel light enough to easily lift with just one hand.
Most high-quality residential garage door springs are rated for approximately 10,000 "cycles" (one cycle equals opening and closing the door once). For the average active Texas family, this equates to roughly 5 to 7 years of daily use. When a spring reaches the end of its structural lifespan, the steel simply snaps under the pressure.
The Threat of Snapped Cables
Working hand-in-hand with the springs are the heavy aircraft-grade steel lift cables. These cables run from the bottom corners of your bottom door panels up to the metal drums spinning on the torsion shaft at the top of the wall.
If a spring snaps, the sudden weight shift often causes these cables to jump off their tracks or fray and break entirely. Trying to operate a garage door with a broken spring or a snapped cable can completely burn out your opener motor in seconds, bend your door panels beyond repair, or cause the entire door to crash down like a guillotine.
7. Environmental Factors Impacting New Braunfels Homes
Living in the beautiful Texas Hill Country brings unique environmental challenges that can directly impact the mechanical longevity and daily performance of your home's overhead garage door system.
Extreme Heat and Intense Sunlight
During our long, blazing Texas summers, temperatures inside an uninsulated garage can easily exceed 120°F. This intense ambient heat thins out cheap lubricants, causing them to drip out of roller bearings and off hinges, leaving moving metal parts raw and unprotected. Furthermore, if your garage door directly faces the morning or afternoon sun, the intense solar glare can actually blind the infrared receiving photo-eye sensor, causing it to think there is an obstruction and preventing the door from closing until the sun shifts.
Humidity and Foundation Shifts
The weather patterns in New Braunfels can swing from extended droughts to sudden, heavy downpours. This constant cycling causes our local clay-rich soil to expand and contract dramatically, leading to structural foundation settling in many homes. If your garage floor shifts even slightly, the concrete beneath your garage door may no longer be completely flat. This creates gaps where pests can enter, or it tricks your opener's sensitive travel limits into reversing the door every time it touches the newly raised concrete.
8. Professional Maintenance Checklist
To keep your garage door working perfectly through every season, it helps to know how professional technicians evaluate an overhead door system. For trusted insights into overall home systems and safety regulations, you can review the extensive standards provided by the International Association of Certified Home Inspectors.
When a certified technician performs a comprehensive multi-point inspection on your garage door, they focus on the following core areas:
The Professional Inspection Checklist
- Visual Hardware Audit: Inspecting every hinge, bracket, track bolt, and support strut for hairline fractures, rust spots, or structural metal fatigue.
- Balance Testing: Disconnecting the opener and lifting the door manually halfway up. A perfectly balanced door will hover in place on its own; if it crashes down or flies upward, the spring tension is incorrect.
- Roller and Bearing Inspection: Checking every individual roller wheel for lateral play, worn bearings, and structural integrity.
- Cable Integrity Check: Scanning the entire length of both high-tension steel cables for frayed strands, corrosion, or signs of improper drum wrapping.
- Safety Reverse Testing: Placing a 2x4 block of wood flat on the ground beneath the door and closing it. The door must instantly reverse the moment it strikes the wood; if it keeps pressing down, the safety systems require calibration.
- Opener Gear Train Evaluation: Opening the motor chassis to inspect the internal drive gears for plastic shaving buildup, indicating premature wear or motor strain.
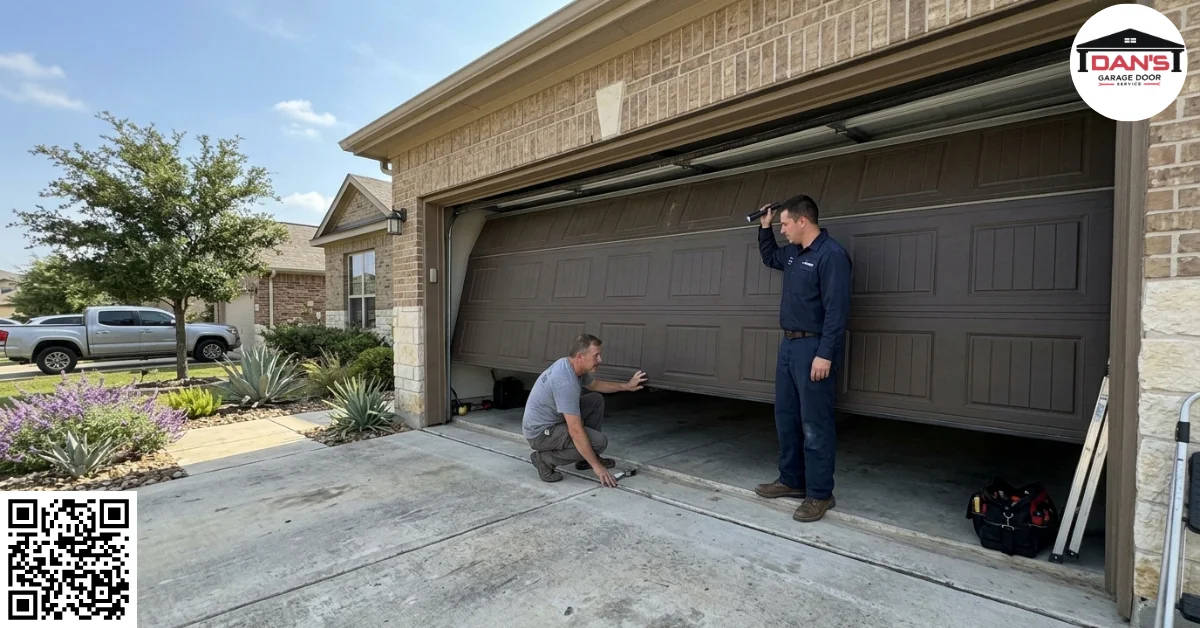
9. Choosing the Right Local Garage Door Repair Expert
When a repair requires professional tools and advanced mechanical knowledge, choosing a trustworthy local contractor is critical for your peace of mind and family safety.
Why Local Expertise Matters
While big-box national service networks exist, choosing a local, community-rooted service provider ensures you receive rapid response times when you are stuck in deeply. A local business understands the specific architectural styles found across Comal County neighborhoods—from historic homes near Gruene to modern builds in master-planned communities.
Critical Credentials to Look For
Before letting any technician work on your home, protect your property by checking for these essential qualifications:
- Comprehensive Insurance Coverage: Ensure the company carries robust general liability and workers' compensation insurance to protect you from financial liability in the rare event of an on-site accident.
- Transparent, Upfront Estimates: A reputable contractor will never begin physical work or perform repairs without thoroughly diagnosing the problem, explaining your options, and providing a clear, written cost breakdown.
- Positive Local Track Record: Look for a company with a proven history of stellar reviews from real neighbors right here in your community.
For additional resources on consumer protection and verified business performance metrics across Texas, you can cross-reference local service standards with the Texas Department of Licensing and Regulation.
Frequently Asked Questions (FAQs)
Why does my garage door close all the way to the floor and then instantly pop back open?
This issue is almost always caused by closed travel limit settings that are configured too deeplyweight shift or an uneven garage floor. The opener motor assumes it has struck an obstruction when it hits the ground forcefully, triggering its automatic safety reversal mechanism.
Can I still use my garage door if I notice one of the lifting cables is slightly frayed?
No, you should immediately refrain from operating the door if a cable shows any signs of fraying or structural wear. A frayed cable is under extreme mechanical tension and can snap completely at any moment, causing the heavy door to drop unexpectedly and cause catastrophic property damage or severe injury.
Why does my garage door remote control only work when I am standing right next to the garage door?
This short-range issue is typically caused by a dying battery inside the remote control transmitter or local radio frequency interference. You can learn more about how consumer electronics and radio frequencies operate by visiting the Federal Communications Commission.
Is it safe for me to replace my own broken garage door torsion spring if I buy the parts online?
No, replacing a residential torsion spring is an extremely high-risk repair that should never be attempted as a DIY project. These springs store immense mechanical energy that can cause severe, life-threatening injuries if handled without specialized professional tools, training, and winding cones.
Final Thoughts
A garage door that refuses to close can completely throw off your day, jeopardize your home's security, and put your family's safety at risk. While simple problems like a blocked photo-eye sensor or a dusty track can be quickly remedied with a soft cloth and a bit of DIY troubleshooting, major mechanical issues require professional hands.
When dealing with high-tension springs, heavy steel cables, or complex electronic motor calibrations, investing in certified, professional repair services is the smartest choice you can make for your home. Regular preventative care and prompt professional attention when components begin to wear down will keep your garage door operating quietly, safely, and reliably for many years to come.
How Can Dan's Garage Door Service Help You?
When your overhead door system acts up and leaves your home wide open, you don't have to tackle the stress alone. At Dan's Garage Door Service, we have spent over 15 years providing top-tier, reliable garage door repair solutions directly to our neighbors throughout the area. Whether you are dealing with a misaligned safety sensor, a broken torsion spring, or an opener motor that refuses to cooperate, our team of highly skilled, insured technicians is ready to deliver fast, honest, and expert service to get your home secure and your door moving perfectly once again.
Don't let a stubborn garage door ruin your weekend plans or compromise your peace of mind. Give us a call or visit our local shop today to schedule your comprehensive diagnostic inspection!
- Company Name: Dan's Garage Door Service
- Business Address: 2780 Wegner Rd, New Braunfels, TX 78130
- Phone Number: (210) 708-9042